Search Wizard
This section takes you through each step required to use the Search Wizard: launch the wizard (two ways), create or select a project, select file types to include, select file location(s), enter connection information, enter search criteria and start the search, and enter connection information and update reports.
Launch the Search Wizard
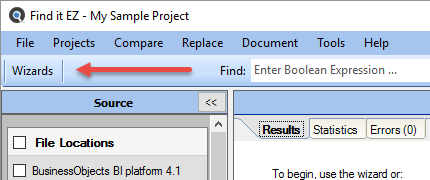
The Search Wizard is launched only via the button (i.e. this wizard cannot be accessed via the menu), as follows:
Click to choose the Search Wizard option:
Option 1: Search for a specific database object, code snippet, or variable to find any reference throughout all of my source code (including within reports and databases)
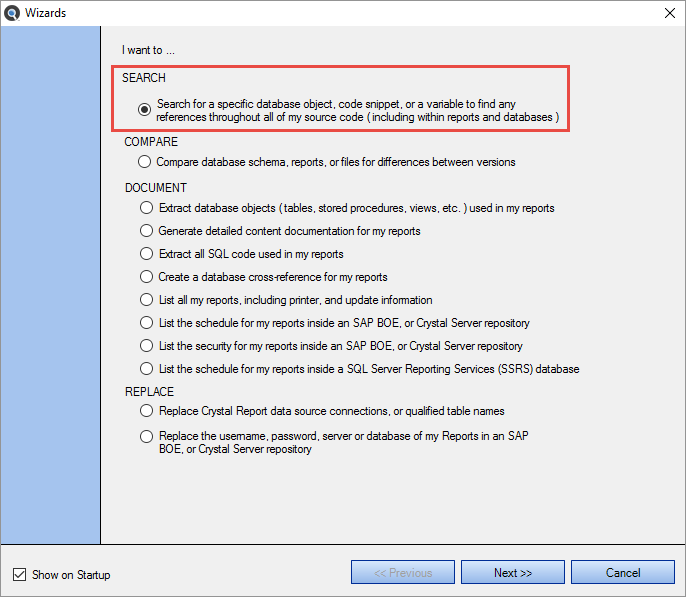
Click on the button to continue.
The Search Wizard will open.
Create or Select a Project
Projects are used to group and save search settings, filters, and directories between sessions.
-
After you Launch the Search Wizard., the following dialog will appear:
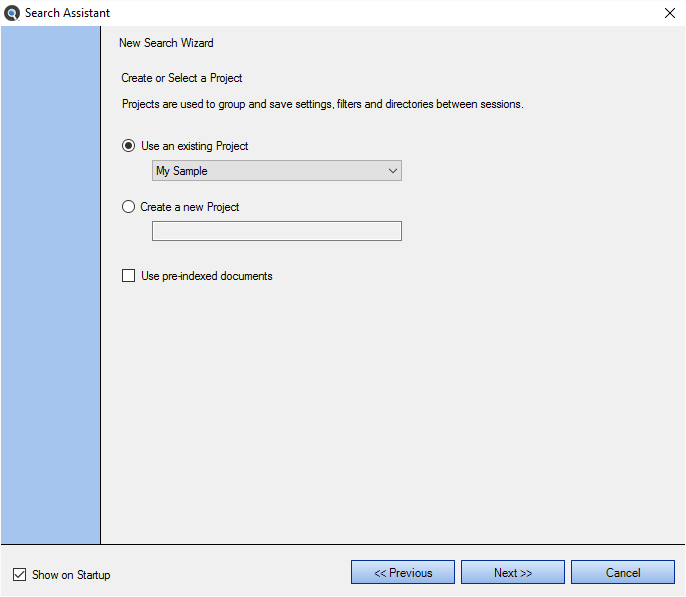
- To use an existing project for your search:
- Click to choose the Use an existing Project option (selected by default).
- From the project drop-down list, click to select the name of the existing project (i.e. settings) you would like to use for your search.
- To create a new project for your search:
- Click to choose the Create a new Project option.
- In the project text box, enter the name of the new project.
-
To use pre-indexed documents for this search, click to check the Use pre-indexed documents check-box.
Tip:
-
Click on the button to continue.
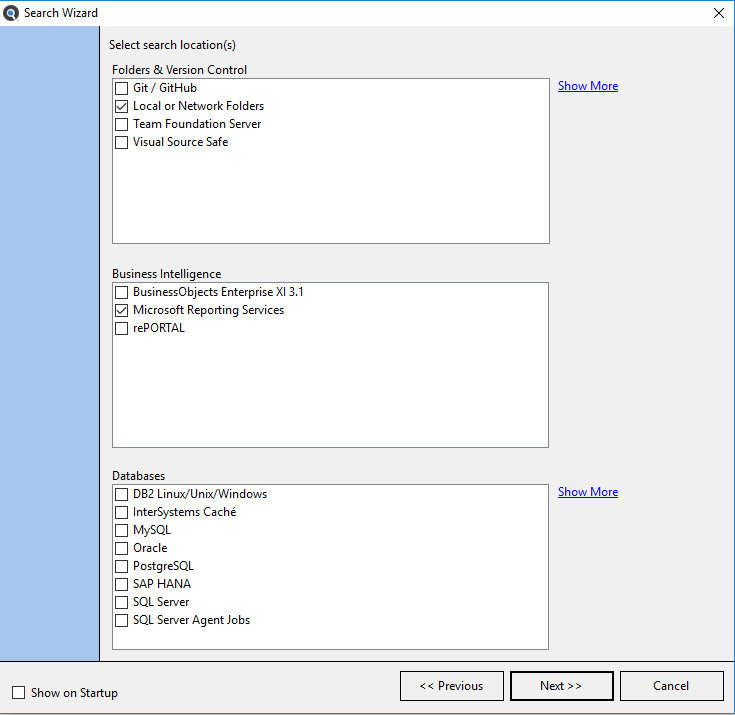
Select File Location(s)
A number of Search Wizard options include this dialog box. See example below:
- In the
- In the Databases list, click to select the source database(s) within which you want to search.
-
Click on the button to continue.
Note: To go back to the previous step, click on the button.
Enter Connection Information
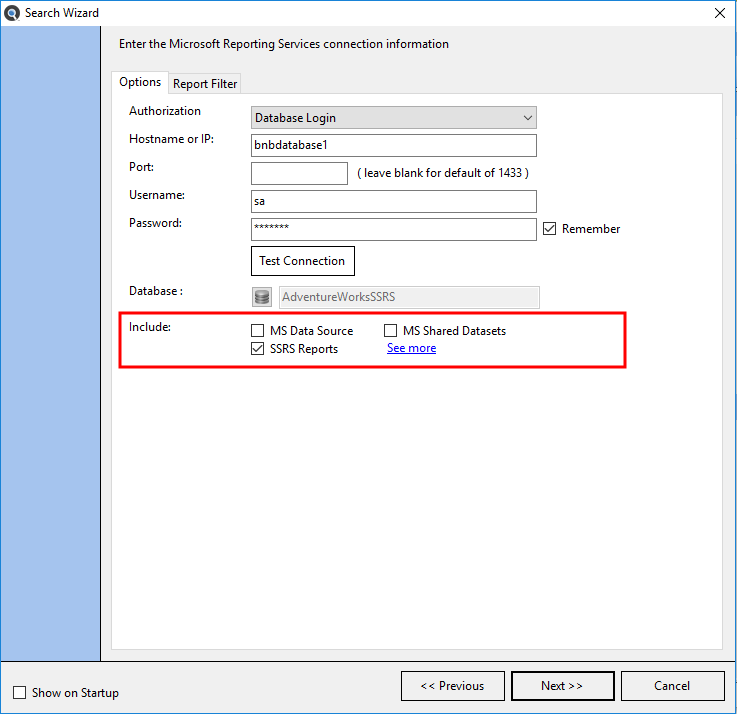
The following example is for SQL Server Reporting Services (SSRS) connection information.
The following examples are for SQL Server database connections and local or network folders:
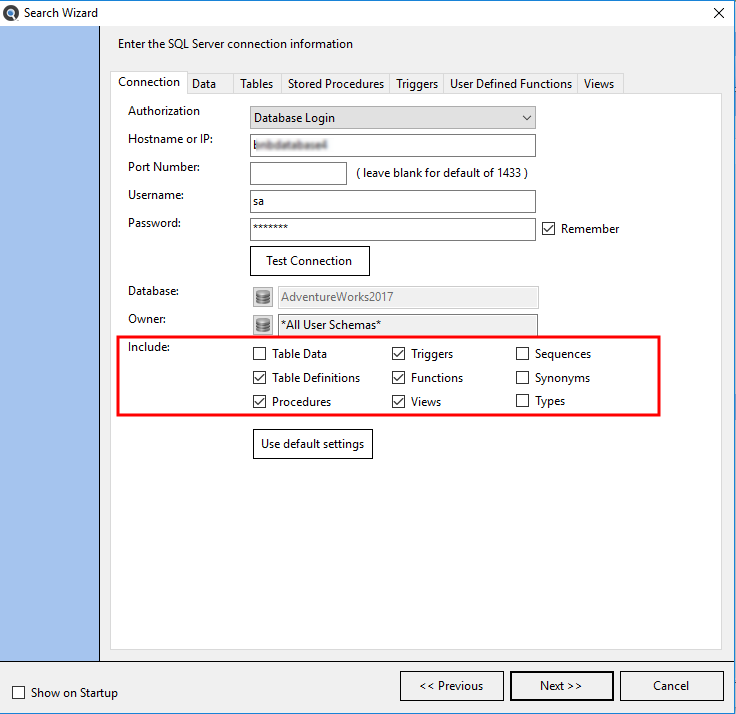
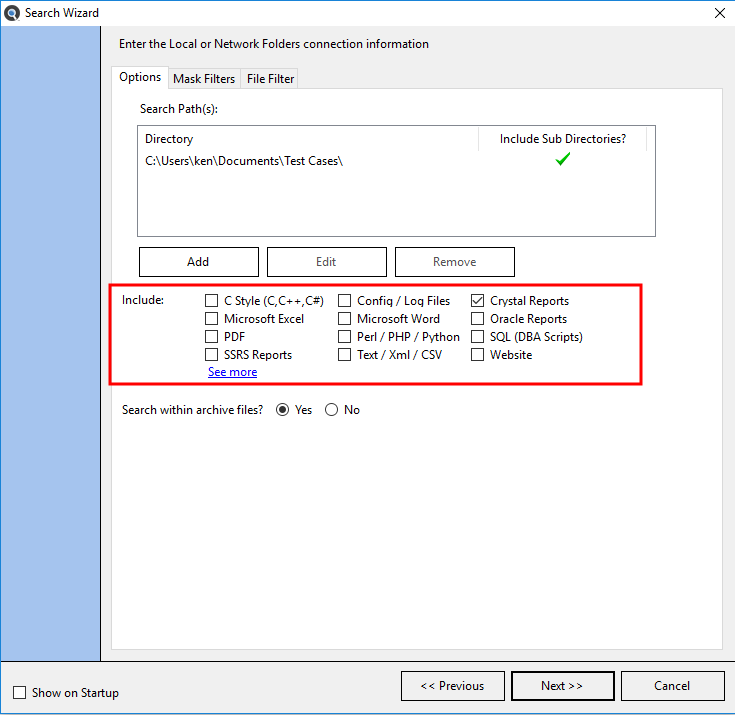
- On the Options tab (selected by default), enter the connection information for the selected source.
- To test the connection, click on the button where applicable.
- In the Include section, select all document types you wish to search.
- To optionally apply a filters in order to limit the subset of documents to be included, click on any of the object Filter tabs to right of the Options tab and see links below for more detail.
- To continue, click on the button. Repeat for each selected configuration panel as necessary.
Alert: You must select at least one document type to be included from each source location.
Enter Search Criteria and Start Search
This dialog is the final step in the Search Wizard. See below:
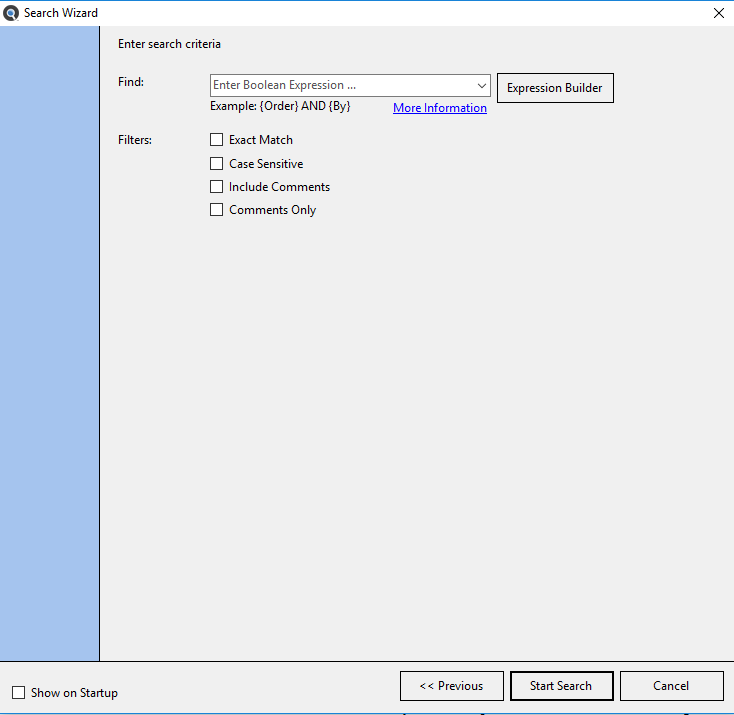
- From the Search Type drop-down list, click to select one of the following options:
- Boolean (can include wildcards)
-
In the Find text box, enter the desired search expression.
Tip: Click on the More Information link for search expression hints, or click on the button for assistance building complex boolean queries.
- In the Content Filters section, click to select the desired filters:
- Exact Match - exact word match for Boolean search. When enabled, matching will be attempted within each individual word, not across words, and is case-insensitive. If disabled (default), for Boolean, this would essentially behave like a wildcard (partial word) match.
- Case Sensitive - match case of expression.
- Include Comments - default is disabled to reduce false-positive matches. When enabled, comments are searched.
- Comments Only - – default is disabled. When enabled, “include comments” is automatically enabled and ONLY comments are searched.
-
To launch the search, click on the button. A Searching ... dialog will appear. See example below:
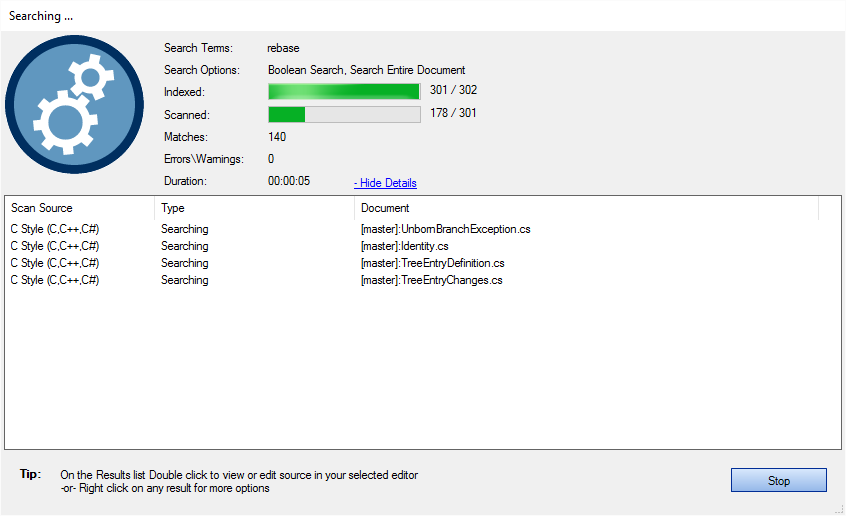
- To stop the search, click on the button.
-
Once the search is complete, any results matching your search criteria will appear in the Results window.