Repositories
This section describes the procedures required to include files stored in various version control systems or report scheduling repositories, enter repository connection information, test a repository connection, select repository folders, and apply a file or report filter.
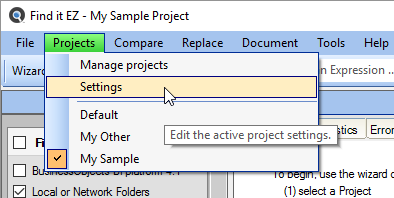
To access project settings for repositories:
-
Edit the active project using the menu.
-
In the frame on the left, in the Location category, locate the Repositories sub category.
Note: You may access the same dialog box with a simple right-click on the desired repository in the expanded Source panel on the left of the main application screen.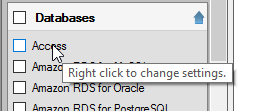
-
-
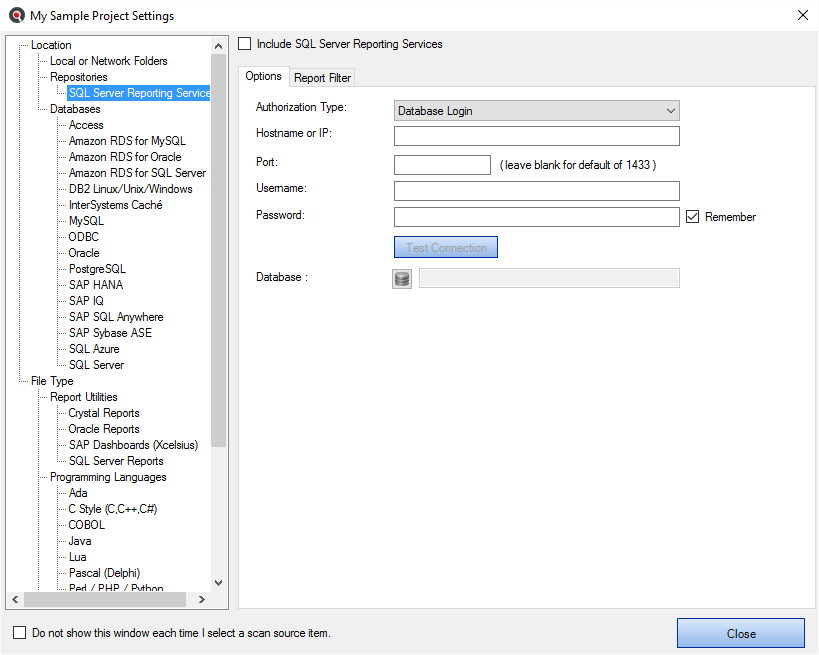
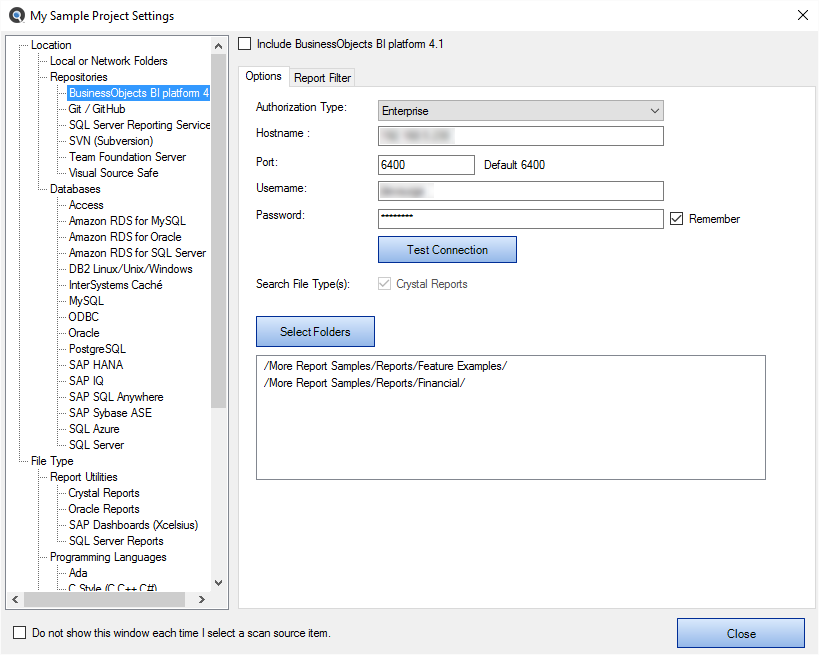
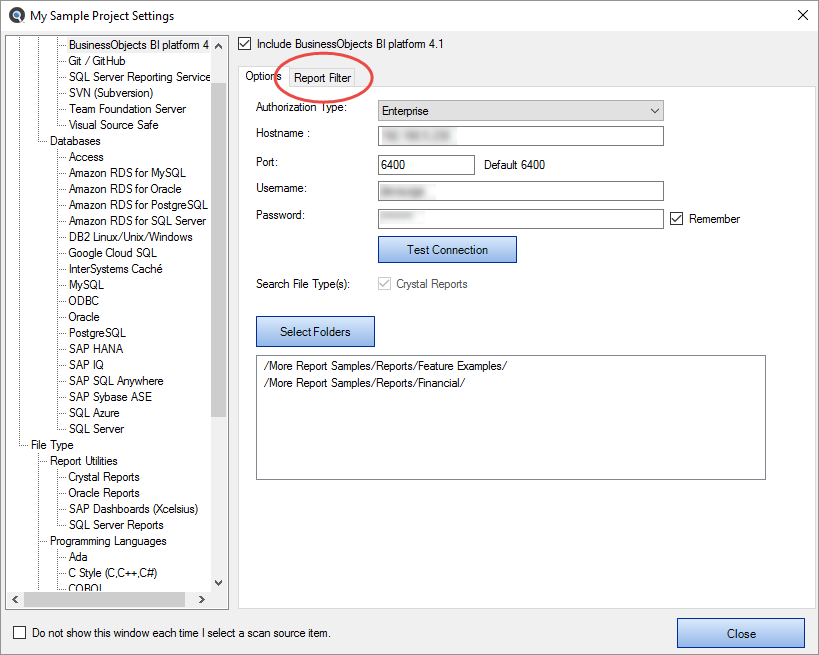
Click on the desired repository name. In the first example below, we have selected the BusinessObjects BI platform 4.1 repository:
In the second example below, we have selected the Git / GitHub repository:
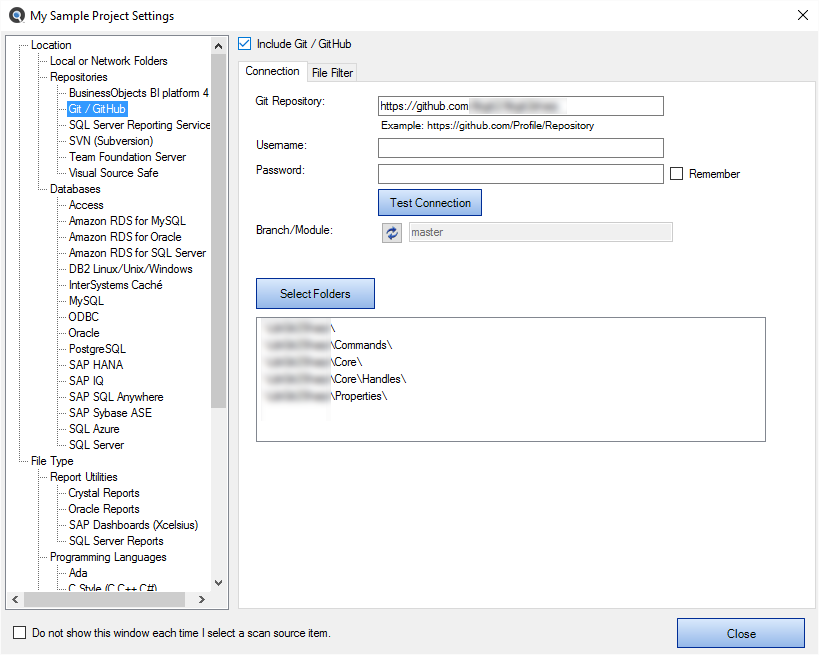
Connection Information - Repositories
- For the selected repository, select and/or enter the required connection information. Depending upon the repository selected, these settings could include:
- Authorization Name
- Hostname
- Port
- Username
- Password
- Search File Type(s)
- Git Repository
- Branch / Module or Branch
- Server URL or Server
- Collection / Project or Project
-
To have Find it EZ remember your password between sessions, click to check the Remember check-box. The default setting is enabled (i.e. checked).
Note: If not saved, each time you start the Find it EZ program, you would be required to re-enter active project repository passwords. Otherwise, the attempt to authenticate your secure connections would fail for any index, search, compare, replace or document process. -
Click on the button to apply your changes.
Test Repository Connection
To test your connection, click on the button. A progress dialog will appear with the following message: "Please wait, contacting the server."

-
If the test is unsuccessful, you will receive an "Unable to connect. Please check your settings and try again." message, along with a Provider Message giving more details.
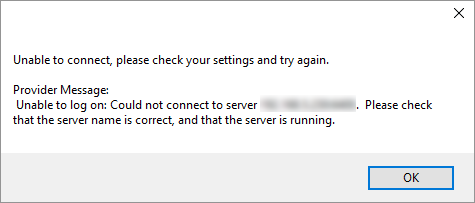
Note: The error handling system will provide up to two messages / alerts:
- Find it EZ will indicate, in general, what happened (e.g. "Unable to connect.").
- The called program may, at times, return a more detailed message that is proprietary to that target system and often provides you with more details to help you resolve the "why" we were unable to connect. We are not in control of the content of that message or when / if it comes back, but we will always display and log the extra details whenever possible.
-
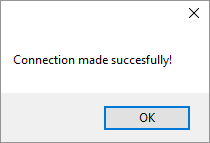
If the test is successful, you will receive a "Connection made successfully!" message.
Select Repository Folders
To select folders, click on the button. A progress dialog will appear: "Please wait, contacting the server."
-
Once connected, a Select Folder dialog will appear, showing a list of all folders included in the selected repository.
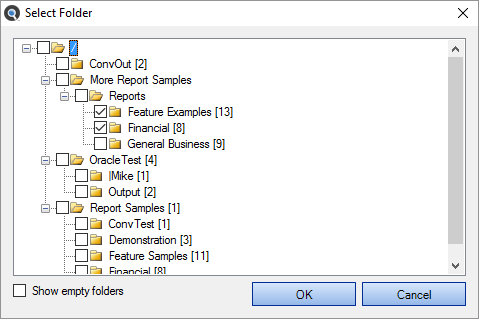
- To show empty folders, click to check the Show empty folders check-box.
-
Select the desired folder(s) or sub-folder(s) by clicking to check the check-box preceding the desired folder(s).
Tip: Clicking to check a parent folder will auto select / deselect all sub-folders.
- Once selections have been made, click on the button. The selected folder(s) will appear in the folders list.
Apply Report Filter
To apply a report or file filter on a set of Repository documents to be included:
-
Open the desired Repository dialog box.
-
Click to select the Report Filter tab.

-
To include all reports, click to choose the Include all Reports option. This is the default selection.
OR
- To include only a subset of reports, click to choose the Only include this subset of Reports option.
- To add a subset:
Click on the button. An Add Filter dialog will appear. The Available Reports list will be populated with a list of reports included in the previously selected folder(s) (on the Options tab).
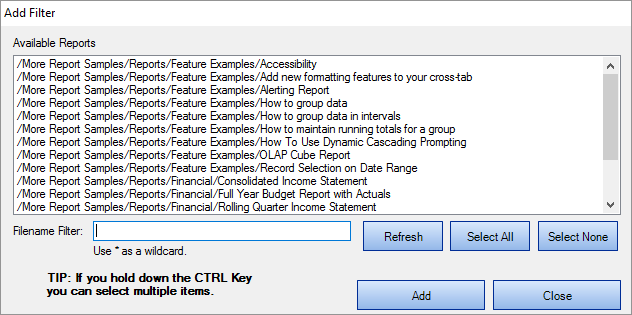
Click to select the desired report(s).
Note: Select multiple items by holding down the Ctrl key. Or, click on the Select All or button, or the button as desired.OR- To filter by name, use the Filename Filter.
Click inside the Filename Filter text box.

Enter the desired file name filter, using wildcards as desired (e.g. *.cs, *.js, *user", etc.).
 Note: This filter applies to the file name itself, and does not apply to the drive letter, folders, or path names.
Select one or more files from the list.
Tip: use the Select All button or hold down the Ctrl key then click to select multiple items.
- Once complete, click on the button. The selected reports will be added to the Only include this subset of Reports list.
- Repeat steps 5a through 5e to add additional files as desired.
AND / OR
- To paste a subset from the clipboard:
- Click on the button. The clipboard contents will be added directly to the Only include this subset of Reports list.
Optionally repeat Copy then Paste additional fully qualified filenames until completed.
Alert: The clipboard may contain a single file list of filenames, but each line must be formatted with a fully qualified path.
- To remove report(s):
- To remove all reports from the list, click on the button.
- To remove selected report(s) from the list, click to highlight the reports you want to remove, then click on the button.
-
Click on the button to apply your changes.
See Also: