Local or Network Folders
This section describes the procedures required to include the set of selected programming files, reports, and other documents from local or network folders, add or edit search path(s), include / exclude archive files, exclude files or folders, and to apply file filters to restrict processing to only a subset of selected files.
To access the active project settings for local or network (source) folders:
-
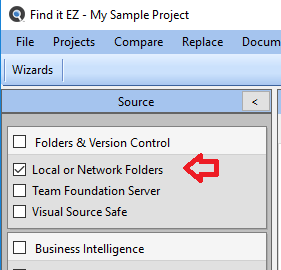
In the frame on the left, in the Folders and Version Control category, click to select Local or Network Folders. See below:
OR
-
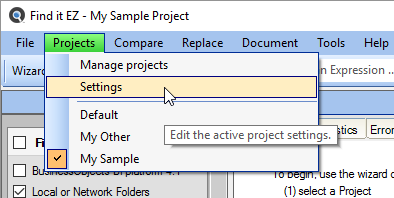
From the menu, select . See below:
-
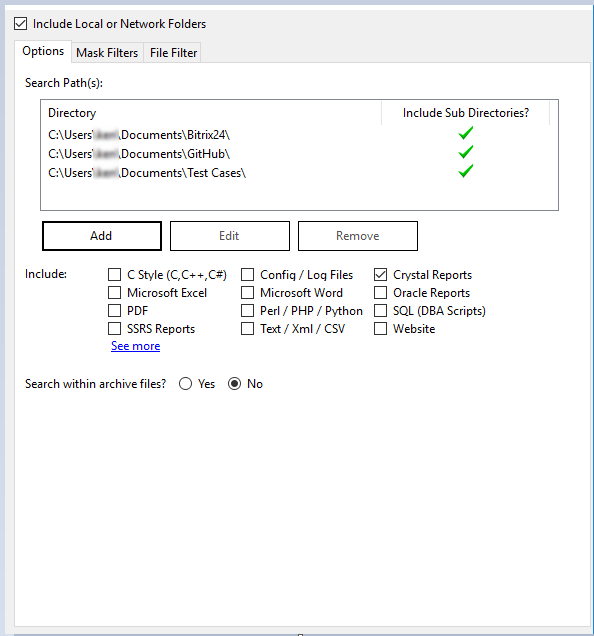
The following dialog box will appear:

Include Source
When a source item is selected from the frame on the left, the Include [Source Name] check-box at the top of the dialog box is checked by default. To exclude the source from your search, click to un-check the check-box.
Add or Edit Search Path(s)
To add a search path to the Local and Network Folders search:
- From the Options tab, click on the button.
-
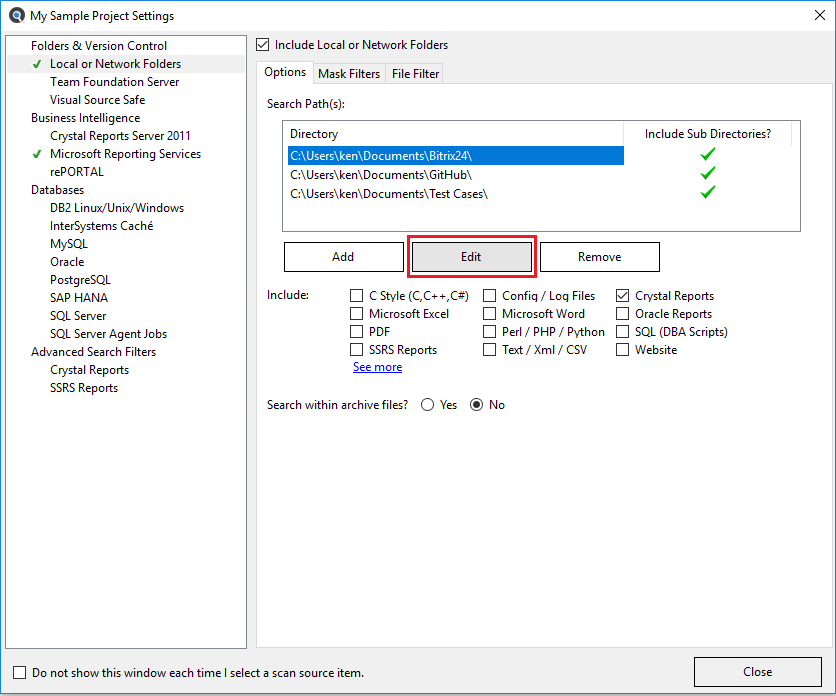
In the Search Path(s) section, click on the button. A Search Path dialog will appear, as below:

-
Click on the folder icon
 button to the right of the Directory field. A Select Folder dialog will appear. See example below:
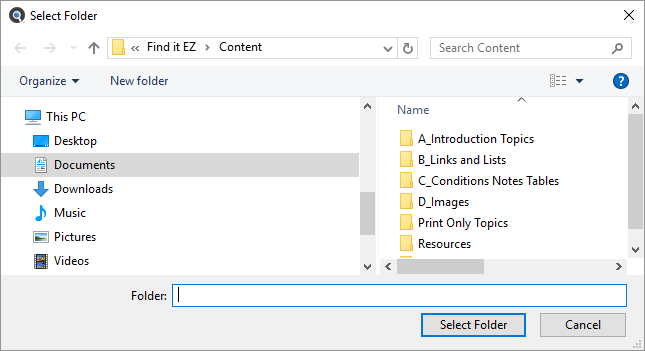
- Navigate to and select the folder you want to add as a search path.
-
Click on the button. The folder path will appear in the Directory field.
Tip: You can also copy and paste or type in a fully-qualified path into the Directory text box.
- Note that the Include Sub Directories check-box is checked by default. To exclude sub directories for the selected folder, click to un-check this check-box.
-
Click on the button. The new search path will be added to the Search Path(s) list. See example below:
 Note: If sub directories have been included for a given search path, a green check mark appears in the corresponding Include Sub Directories? column.
Alert: You will be prevented from entering duplicate paths or overlapping sub-folders for a project.
-
Repeat steps 2 through 5 to add multiple paths.
To edit a search path:
-
In the Search Path(s) list, click to highlight the search path you want to edit. See example below:
- Click on the button.
- Repeat steps 3-5 above.
To remove a search path:
- In the Search Path(s) list, click to highlight the search path you want to remove.
-
Click on the button. The selected search path will be removed from the list.
Click on the button to apply your changes.
Include Archive Files
Whether or not a file is considered an Archive is determined by the file extension. If it is any of the following support Archive types, it will be opened as an archive and Find it EZ will search the contents:
"ARJ", "LZH", "LZMA", "RAR", "RPM", "7Z", "XZ", "BZ2", "BZ", "GZIP", "GZ", "TAR", "ZIP"
To include archive files in your Local or Network Folders search, locate and click the Yes option to Search within archive files.
Exclude Files or Folders
There are three ways to add one or more specific files or folders to be excluded from the selected directories (in the Search Path(s) list) in your Local or Network Folders search:
-
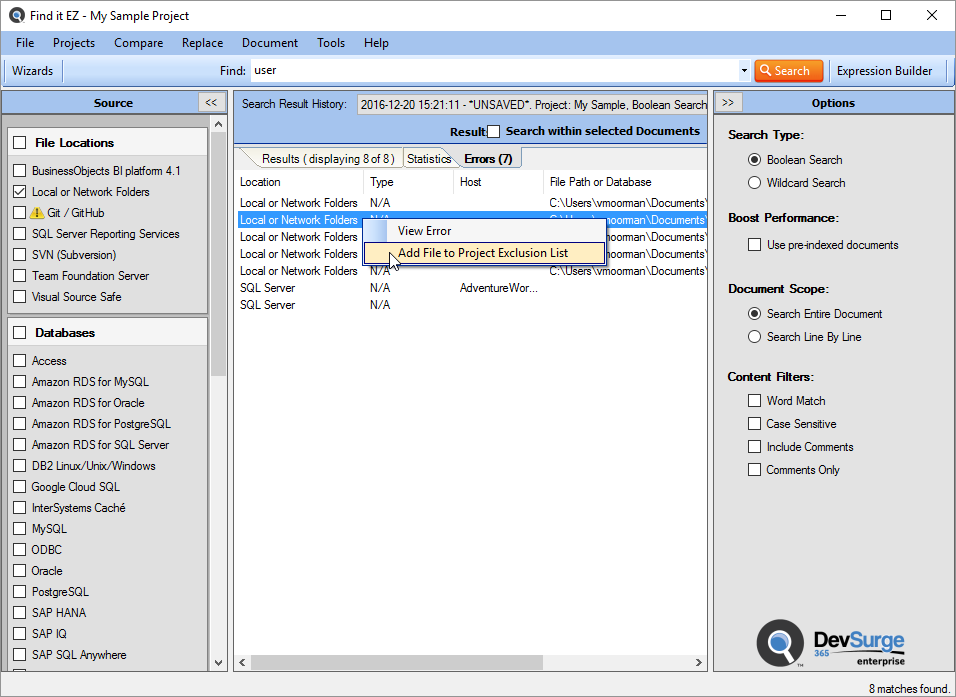
Right-click a search results item in the Errors tab, chose from the context menu. See below:
- To import a list of files to exclude:
In the Exclude files, folders and archives ... section of the Mask Filters tab, click on the button. An Open dialog will appear.
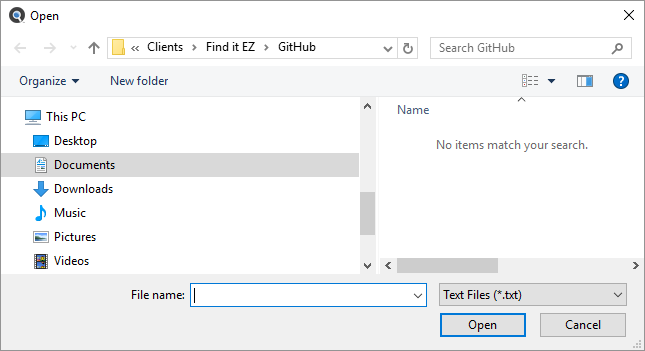
- Navigate to and select the desired *.txt file.
Click on the button. The contents of the selected file will be added to the in the Exclude files, folders and archives ... list.
- Click on the button to apply your exclusions.
AND / OR
- To enter the path, file name, or wildcard to exclude:
Click inside the Exclude files, folders and archives ... text box and enter the desired text to exclude.
Note: Enter each item on a separate line. Use * for wildcards. For example, enter the path to exclude a sub-directory, exclude a specific type of files (e.g. *.cs), etc.- Click on the button to apply your exclusions.
To clear the Exclude File(s) / Folder(s) list:
-
Click on the button. All items in the list will be removed.
Include File Filters
You may use both the Mask Filters and/or the File Filter tabs to include only a subset of specific files within the configured path(s). You must first add the desired source path folders. This filter is often used to minimize false positives or expedite indexing and searching by limiting the number of file contents included in a project. This setting can be quickly changed to include all or a subset of files as needed.
To include one or more files and/or folders based on a wildcard or pattern that matches part of a file or path name:
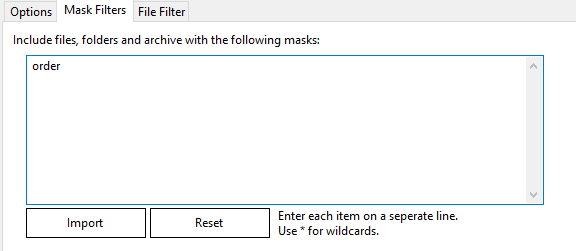
- Open the Local or Network Folders project settings dialog box, click to open the Mask Filters tab, see below:
- By default, all paths and filenames within the Options tab Search Path(s) are included using the wildcard pattern *.* .
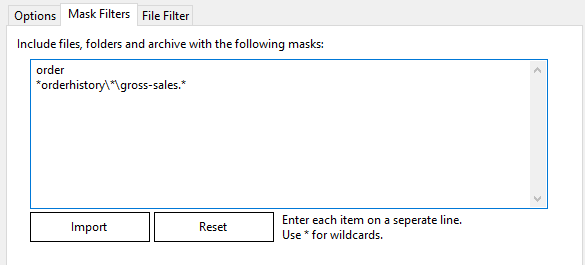
- To only include the subset of files containing the text "order" in either the folder path or filename itself, replace the default *.* pattern with the text order, or *order* , as below:
- To also include any files in a subset of paths such as order history sales report stored by date as follows "..\orderhistory\yyyy-mm\gross-sales.rpt", enter the pattern *\orderhistory\*\gross-sales.* , as below:
- Repeat adding additional patterns on separate lines as needed, or use the button below to import a list of patterns.
- To clear the list, use the button to restore the default *.* pattern ( ie, include all ).

To include one or more specific fully qualified files by name:
-
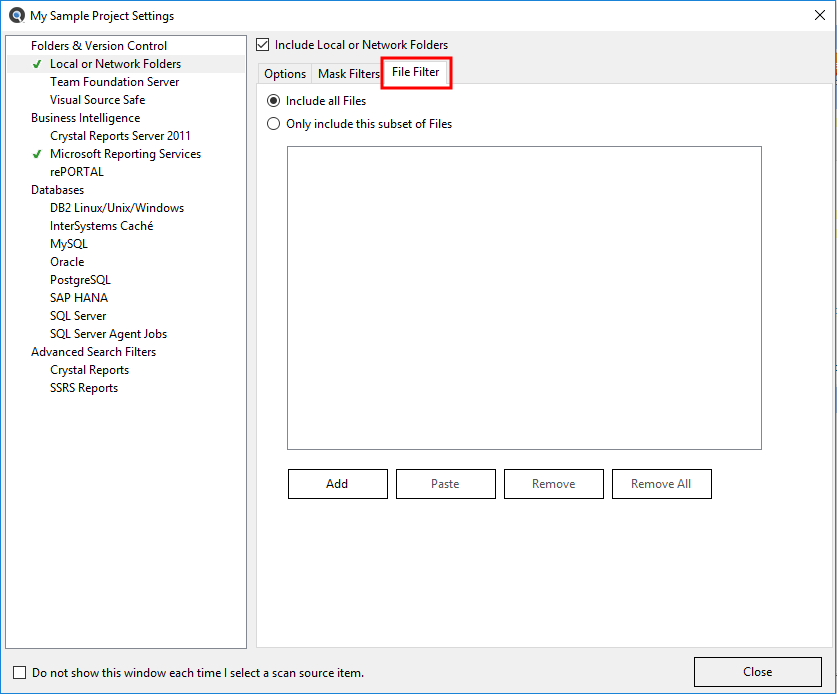
Open the Local or Network Folders project settings dialog box, click to open the File Filter tab, see below:
-
To include all files, click to choose the Include all Files option. This is the default selection.
OR
- To include only a subset of files, click to choose the Only include this subset of Files option.
- To add a subset:
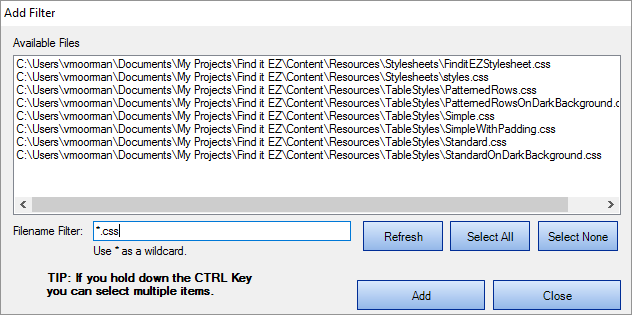
Click on the button. An Add Filter dialog will appear.
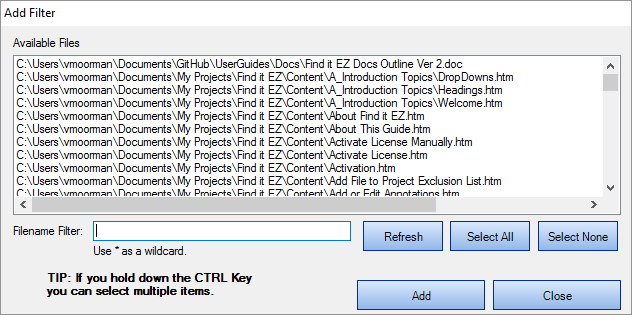
The Available Files list will be populated with a list of files included in the folders selected previously on the Options tab, and filtered to include / exclude specific subsets of files based on any entries on the Mask Filters tab.
Click to select the desired file(s).
Note: Select multiple items by holding down the Ctrl key. Or, click on the button or the button, or the button as desired.- To filter by file name, use the Filename Filter:
Click inside the Filename Filter text box.
Enter the desired file name filter, using wildcards as desired (e.g. *.cs, *.js, *user*, etc.).
 Note: This filter applies to the filename itself, and does not apply to the drive letter, folders or path names.
Select one or more items from the list.
Tip: Use the Select All button or hold the CTRL key then click to select multiple items.
- Once complete, click on the button. The selected files will be added to the Only include this subset of Files list.
Repeat steps 5a through 5e to add additional files as desired.
AND / OR
- To paste a subset from the clipboard:
- Click on the button. The clipboard contents will be added directly to the Only include this subset of Files list.
Optionally repeat Copy then Paste additional fully qualified filenames until completed.
Alert: The clipboard may contain a single file or list of filenames, but each line must be formatted with a fully qualified path.
- To remove file(s):
- To remove all files from the list, click on the button.
- To remove only selected file(s) from the list, click to select the files you want to remove, then click on the button.
-
Click on the button to apply your changes.