Epic Compass Comparison Wizard
This section outlines the procedures required to create the Epic Hyperspace compass compare tab delimited file used as input to the Find it EZ Epic compass comparison wizard, followed by the steps to initiate a change impact analysis search, and export the results produced. The output is a spreadsheet workbook containing all of the matching input rows from the Epic compass compare file along with each document within which matches were located in your local source files, reports and database objects. This output can then be used to assess the overall impact or redistributed to team members responsible for maintaining portions of your application code to prepare for implementing an Epic release update.
Create Epic Hyperspace compass compare ( input ) text file.
-
Launch Epic Hyperspace. From the main menu, select in the upper left.

-
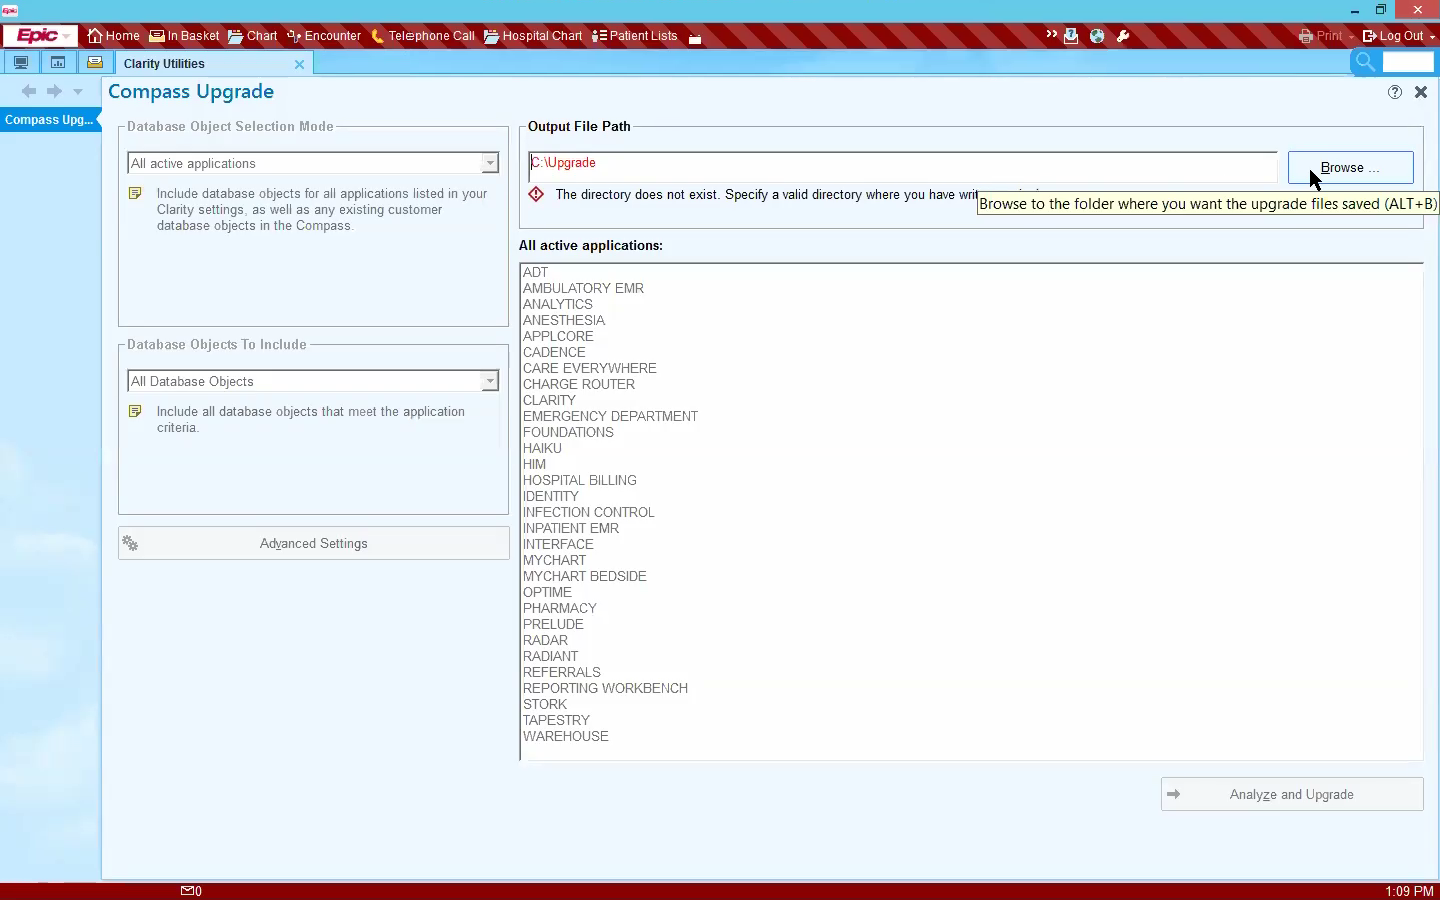
From the Epic sub-menu, select . A Compass Upgrade dialog will appear.

-
Select database and application objects to include, then click on the button to select or create a target folder to store the compass compare results. Click on the button to generate the Epic compass compare change manifest list based on your selections.
-
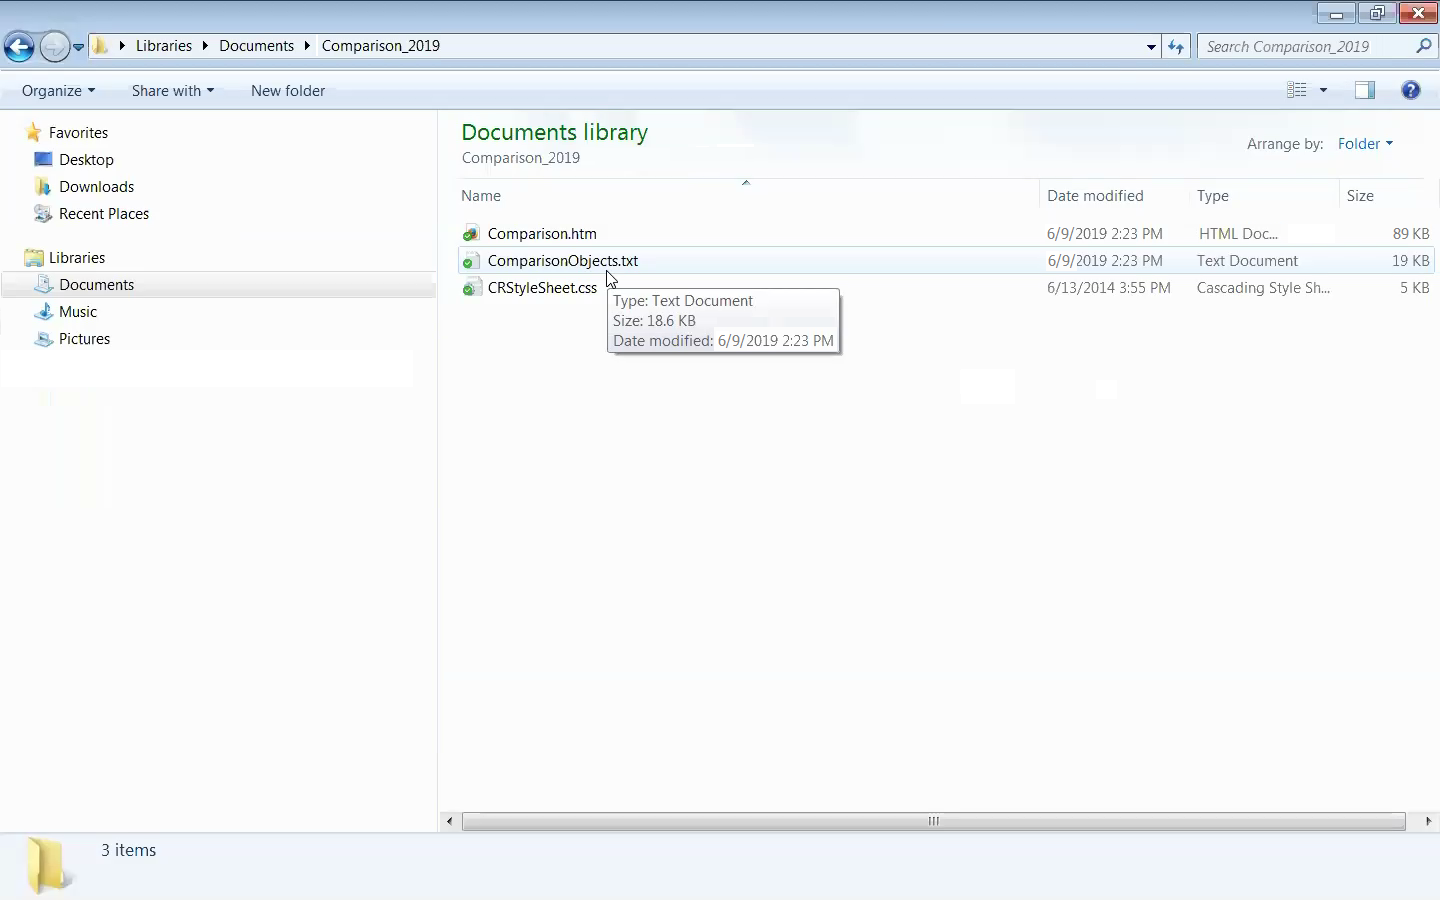
Open the target output folder. The compasscompare.txt ( tab delimited text ) file is the valid input file and content format expected by the Find it EZ Epic compass comparison wizard. See example below:
 Note: The tab delimited text file must contain the following columns (from left to right ): TYPE, OBJECT NAME, COLUMN NAME, CUSTOMER VALUE, EPIC VALUE, APPLICATIONS. This is the default Epic compass compare format produced by the steps above. Only the first 5 columns of this file are used in the Find it EZ Epic compass comparison Wizard, and as such, additional manually produced change manifest columns may exist to the right of the EPIC VALUE column, they will simply be ignored.
Launch the Epic Compass Comparison Wizard
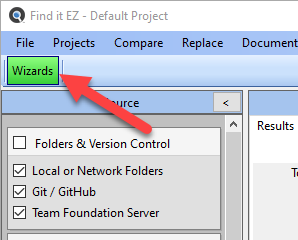
The Epic compass comparison DOCUMENT Wizard can be launched via the button or via the main menu. See below:
- Launch the Epic compass comparison DOCUMENT wizard via the button:
Click on the button in the search bar. See below:
- Click to choose the following DOCUMENT Wizard option:
- Search for all impacted source based on an Epic compass comparison change list
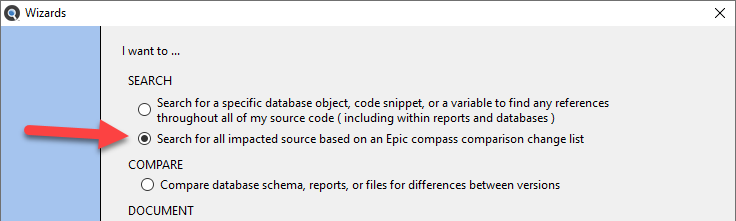
- Search for all impacted source based on an Epic compass comparison change list
- Click on the button to continue.
- The selectedDOCUMENT Wizard will open.
OR
- Launch the Epic compass comparison DOCUMENT Wizard via the Find it EZ menu:
- Select
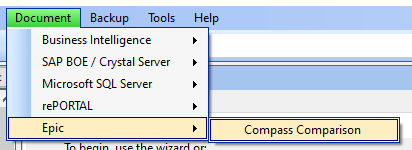
- Select
The Epic Compass Comparison Wizard will open.
Create or Select a Project
Projects are used to group and save search settings, filters, and directories between sessions.
-
After you Launch the Epic Compass Comparison Wizard, the following dialog will appear:
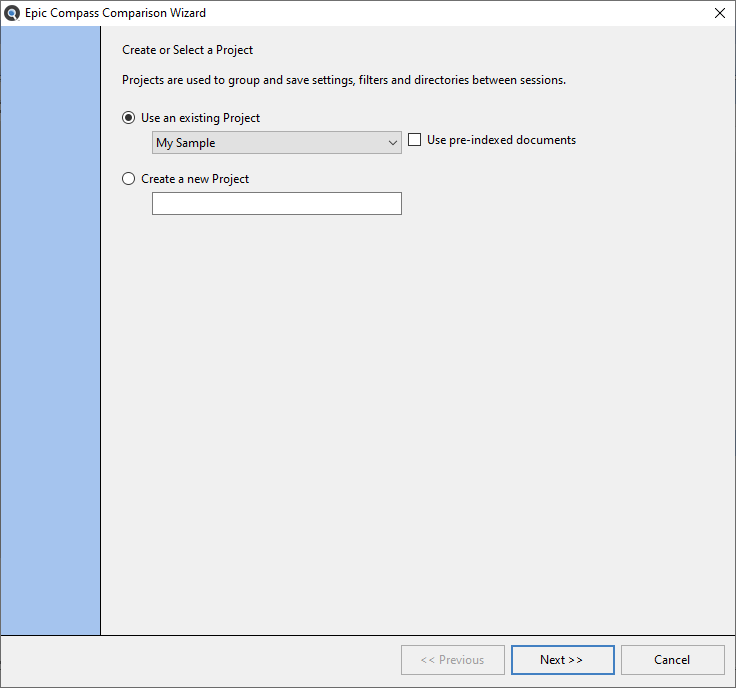
- To use an existing project for your search:
- Click to choose the Use an existing Project option (selected by default).
- From the project drop-down list, click to select the name of the existing project (i.e. settings) you would like to use for your search.
- To create a new project for your search:
- Click to choose the Create a new Project option.
- In the project text box, enter the name of the new project.
-
To use pre-indexed documents for this search, click to check the Use pre-indexed documents check-box.
Tip: Whenever possible, using pre-indexed documents will drastically improve search performance. However, for the first run of the wizard it is recommended you do not enable this feature in order to ensure the latest version of each target document and/or database object is guaranteed to be refreshed within the index for the first pass of each new Epic compass compare text input file or anytime a new source location / document type is planned to be searched for the first time.
-
Click on the button to continue.
Select File, BI Platform and Database Location(s) to Search
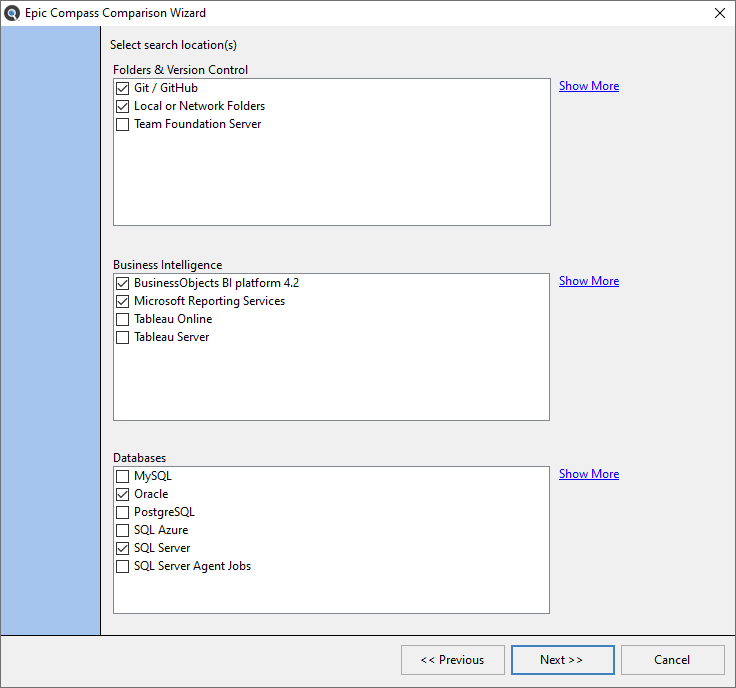
- In the Folders & Version Control and/or Business Intelligence lists, click to select the storage areas within which you want to search.
- In the Databases list, click to select the source database(s) within which you want to search.
-
Click on the button to continue.
Note: To go back to the previous step, click on the button.
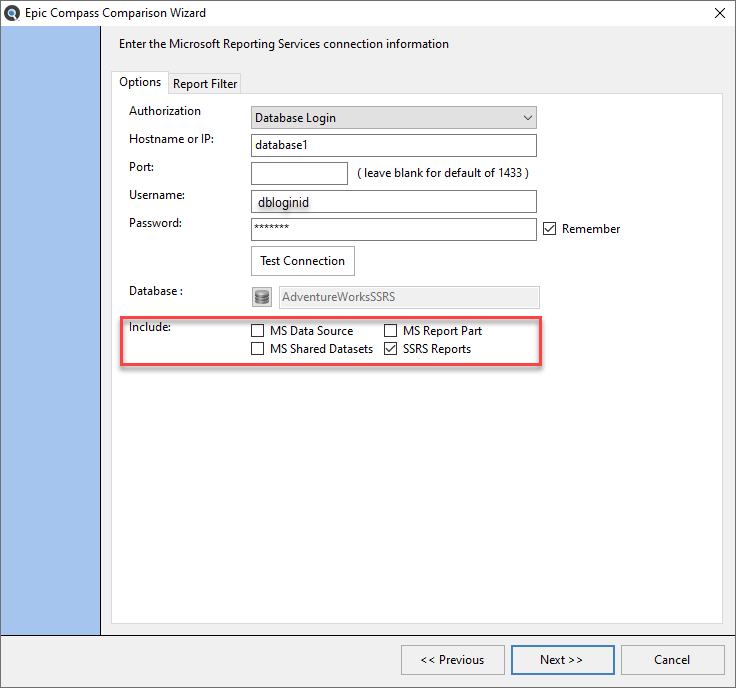
Enter Connection Information
The following example is for Microsoft Reporting Services (SSRS) connection information.
The following examples are for local or network folders and SQL Server databases:
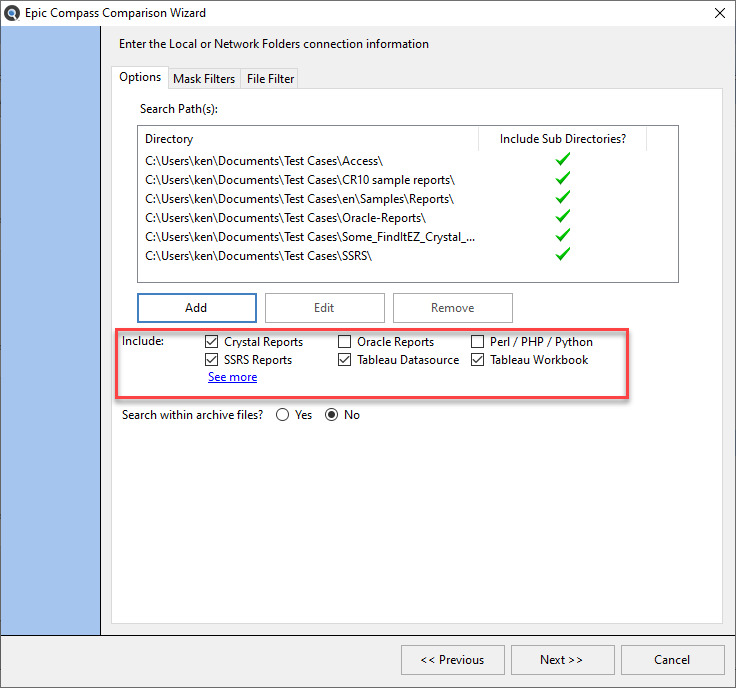
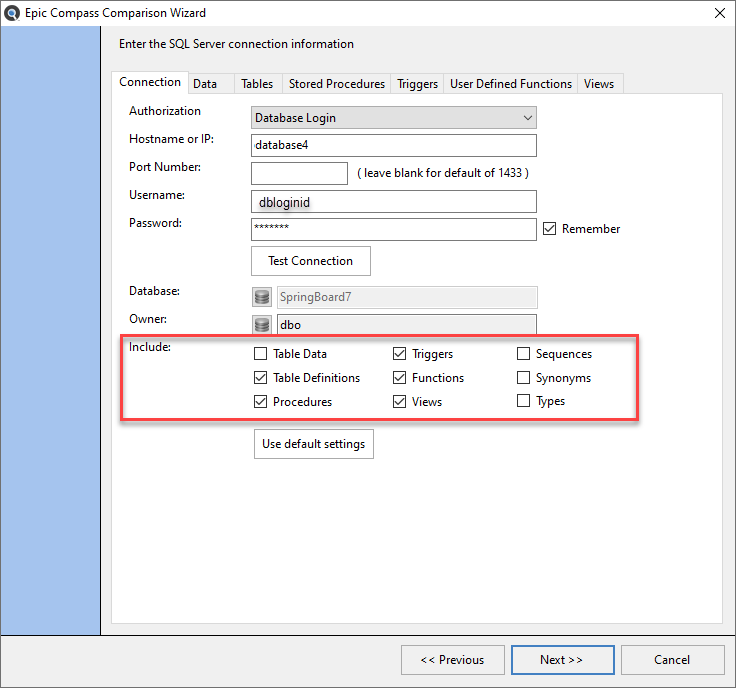
- On the Options tab (selected by default), enter the connection information for the selected source.
- To test the connection, click on the button where applicable.
- In the Include section, select all document types you wish to search.
- To optionally apply a filters in order to limit the subset of documents to be included, click on any of the object Filter tabs to right of the Options tab and see links below for more detail.
- To continue, click on the button. Repeat for each selected configuration panel as necessary.
Alert: You must select at least one document type to be included from each source location.
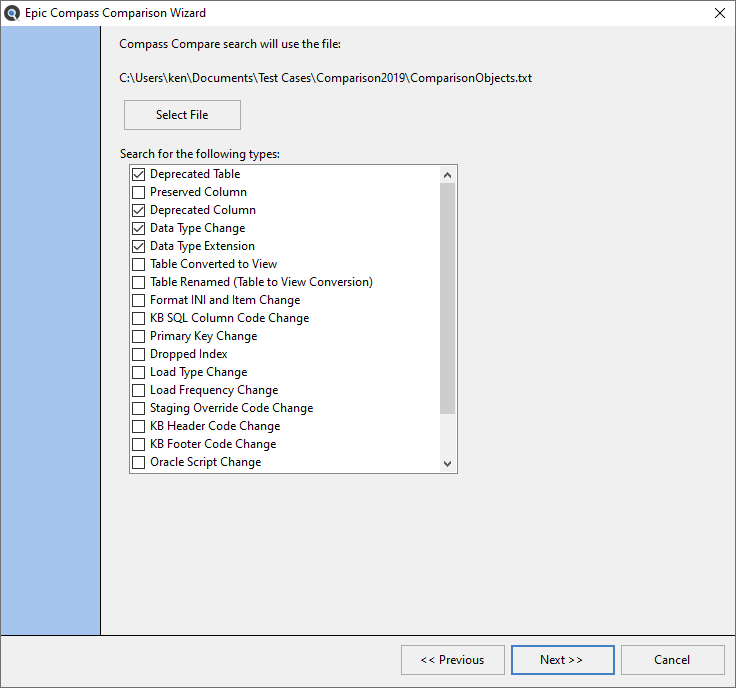
Select Epic Compass Compare File and Change Types
The following dialog steps prompt for selection of the Epic compass compare tab delimited text file and change types included with the file for the search criteria input to the Epic Compass Comparison Wizard. See below:
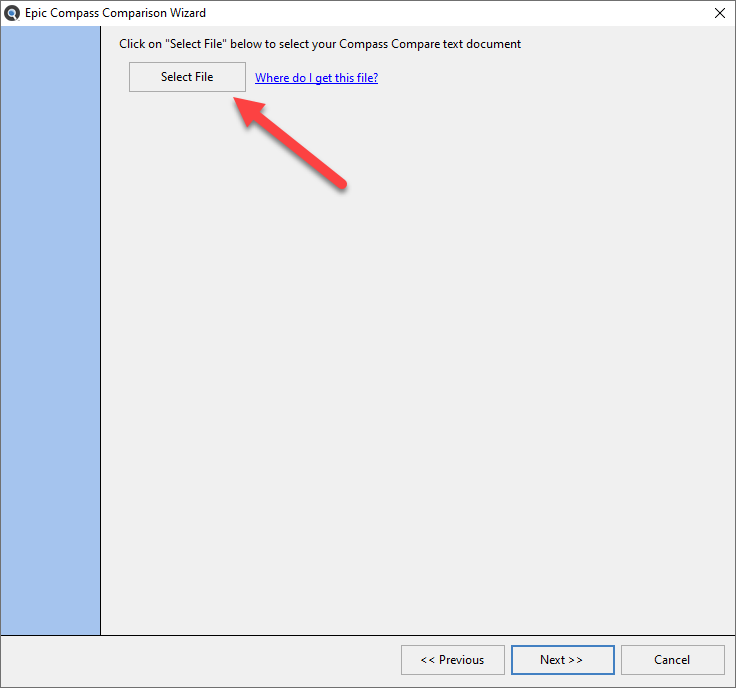
- Click the button. The windows file browser dialog will open. See example below:
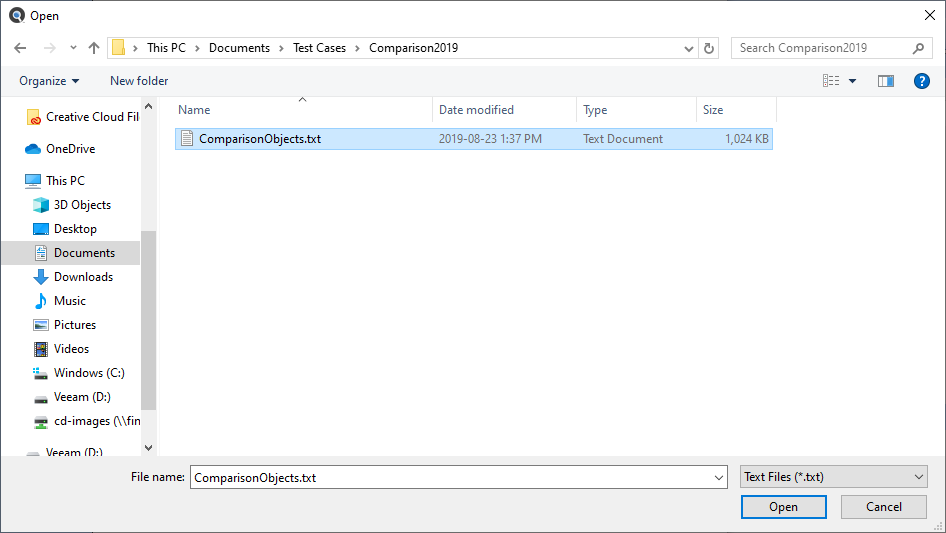
-
Browse to the folder that contains the compasscompare.txt tab delimited text file created in the Create Epic Hyperspace compass compare ( input ) text file steps described above.
- Select ( highlight ) the desired input file and click the button. The change type selection dialog will appear containing all of the selected input file Epic change types available. Several change types will be automatically enabled by default if they are contained within the file: Deprecated Table, Deprecated Column, Data Type Change, Data Type Extension and/or New Column in Existing Table.
-
To chose a different Epic compass compare file, click on the button, and proceed to step 2 above. The change list will be refreshed based on the content of the selected file.
- Select and/or deselect change types desired, then click the button.
Select Export Results Options
The last dialog steps prompt for selection of the contents and format of the worksheets produced by the change impact analysis search results based on the selected Epic compass compare input file. See below:
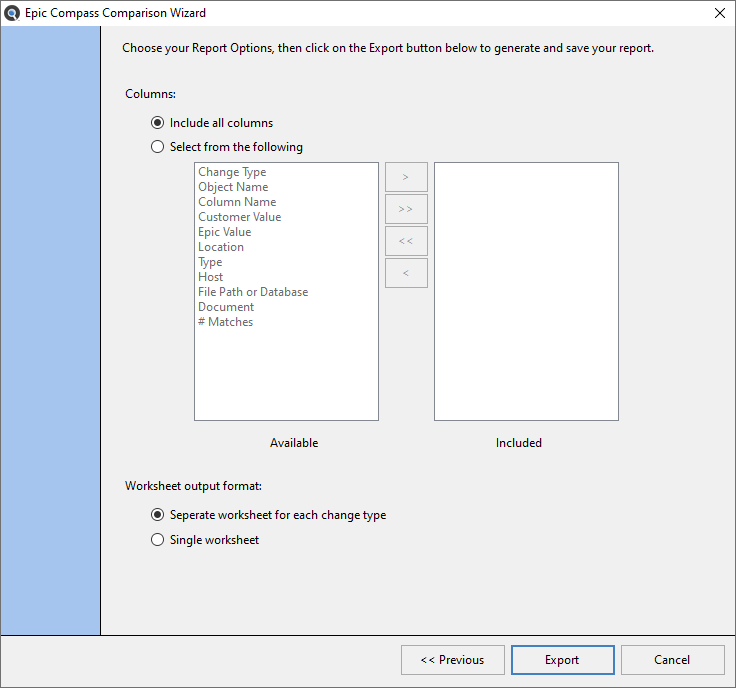
- Select Include all columns or click the Select from the following radial button to chose a subset of columns to include in the change manifest search results spreadsheet(s) produced.
- Select Single worksheet to export all search results to a single spreadsheet, or use the default Separate worksheet for each change type to produce separate spreadsheet tabs within the workbook for each Epic change type selected for processing.
Tip: The results are sorted and exported in groups based on the Epic compass compare input file lines where one or more matches are found in the source documents being searched. You may sort the results as desired within your spreadsheet editor program. If a large number of matches are found, you may need to choose smaller subsets of Epic change types for each wizard pass, or save the results to separate worksheets for each change type to avoid issues when working with the results within your spreadsheet program ( eg: Microsoft Excel ).
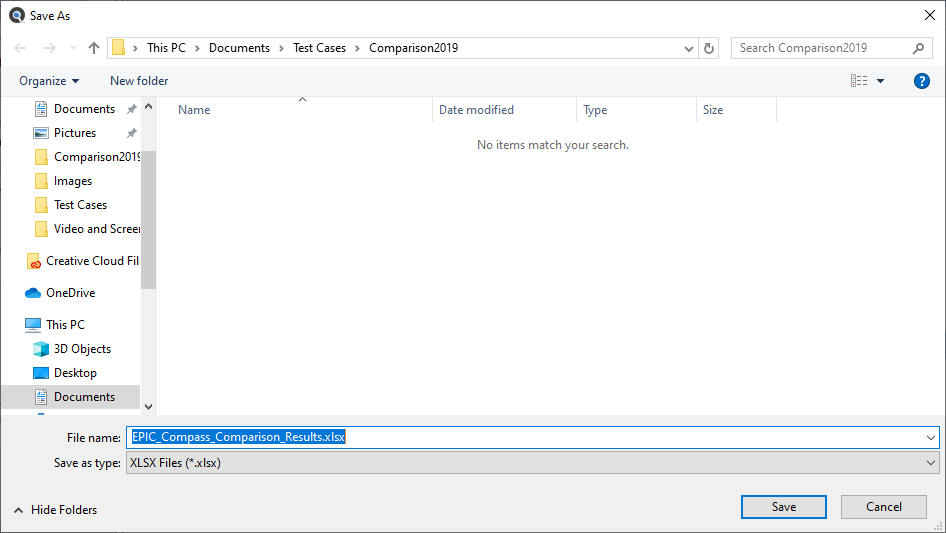
- Click the button. The windows file browser dialog will open. See example below:
- Chose a destination folder and enter a target workbook ( .xlsx ) filename and click the button to store and view your results.