Wizards Overview
This section describes how to launch the various available Wizards, understand the purpose of each unique option, and to set the main Wizards dialog to show (or not) on application start-up.
Launch the Wizards
The Wizards walk you through the steps required to set up and run a search, generate documentation, and perform other common tasks. If the Show on Start-up option is selected, the Wizards dialog will open automatically when you start up Find it EZ.
If the Wizards dialog does not open automatically, follow these steps:
-
Click on the button. The Wizards dialog box will appear.

- Click to choose the desired search option.
- Click on the button to continue.
- Create or select a new project:
- Click to choose the Use an existing project option, then select the desired project from the drop-down list,
OR
-
Click to choose the Create a new project option and enter the desired project name into the corresponding text box.
- Click on the button to continue.
- Select the file types to include in your search:
- Click to check each item you want to include.
- Click on the button to continue.
- Select the desired file locations:
- Click to check any Databases you want to search.
- Click on the button to continue.
-
Enter connection information for each
Note: If more than one source location is selected, connection information will be requested for each source.- Click on the button to verify your connection.
- Click on the button to continue.
- Enter your search criteria:
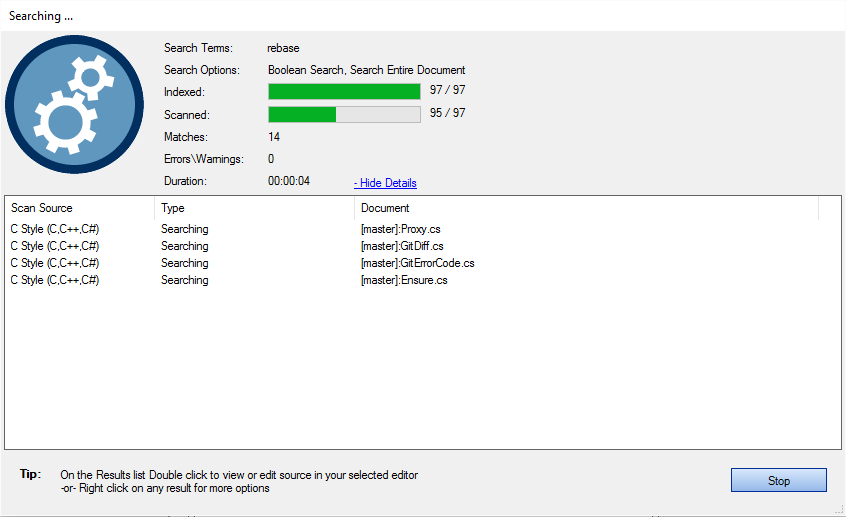
- Once the search is complete, results will appear in the Results window.
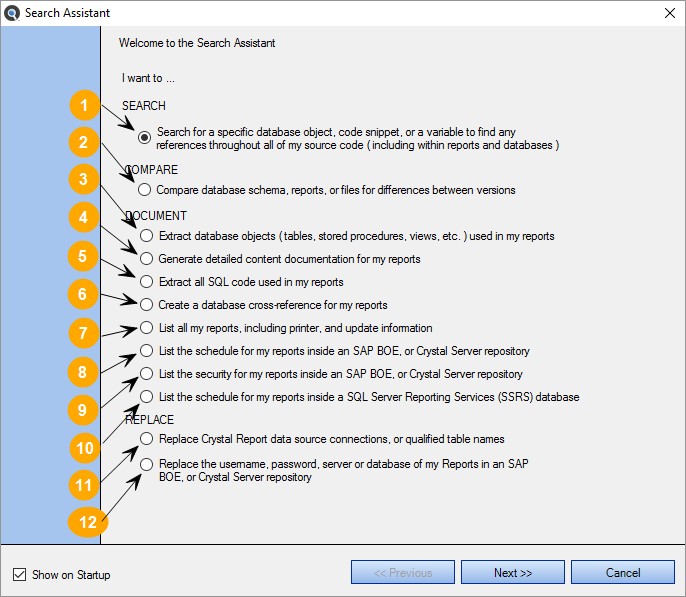
Wizards Options
Refer to the image and table below for a description of each option:
| # | Wizard | Menu Shortcut | Use Case / Document Produced | Sample Documents |
|---|---|---|---|---|

|
Search for a specific database object, code snippet, or a variable to find any references throughout all of my source code (including within reports and databases) | See links at end of topic. | Use Boolean or Wildcard search expressions to find all references to any text throughout your entire code stack, data files or office documents. Search results are displayed in the main application window with highlighted match details for each document containing a "hit." Interactive to-do list results can then be used to launch an editor of your choice to work with the original source document, or lists can be updated, saved, printed or exported to various file formats such as HTML, text, CSV or Excel spreadsheets as needed. | List XLSX |

|
Compare database schema, reports, or files for differences between versions | Mass compare release branches for differences in versions of your code files, reports or database schema and SQL code objects (procedures, triggers, views, functions). Drill down with detailed "diff" tool to view highlighted side-by-side target and source file differences pinpointing exactly what has changed. Export results to Excel lists or scrollable, highlighted HTML. | List XLSX | |

|
Extract database objects (tables, stored procedures, views, etc.) used in my reports | Create a list of data source connections, server host names, database names, tables, procedures, views, table links (joins), call statements, parameters and includes both embedded SQL SELECT statements from within your reports or the underlying database SQL code content. Results are exported to Excel with customizable column selections. | XLSX | |

|
Generate detailed content documentation for my reports | Automatically generate detailed report documentation for your entire report library in a consistent layout and format. Complete report specifications in a standard format are exported in your choice of HTML or TXT format. Create a single file for each report processed, or export all results into file with page-breaks for each report. | ||

|
Extract all SQL code used in my reports | Extract all SQL statements embedded within your reports, including run-time derived SQL commands and table joins from a visual drag-and-drop designer. Export documentation to your choice of HTML or TXT format. Create a single file for each report processed, or export all results into file with page-breaks for each report. | ||

|
Create a database cross-reference for my reports | Create a complete database cross-reference for all of your reports. List tables and database fields used within your reports by location (where used / referenced). Results are exported to Excel with customizable column selections. | XLSX | |

|
List all my reports, including printer and update information | Create a real-time list of all of your reports, including author information, last updated, where located, etc. Results are exported to Excel with customizable column selections. | XLSX | |

|
List the schedule for my reports inside an SAP BOE or Crystal Server Repository | Create a real-time list of all Crystal Report schedules within your SAP BOE or Crystal Server repository, including deliver to, output format, schedule frequency, data or event triggers, report parameters and more. Results are exported to Excel with customizable column selections. | XLSX | |

|
List the security for my reports inside an SAP BOE or Crystal Server Repository | Create a real-time list of Crystal Report security access for all schedules and reports located within your SAP BOE or Crystal Server. Results are exported to Excel with customizable column selections. | XLSX | |

|
List the schedule for my reports inside a SQL Server Reporting Services (SSRS) database | Create a real-time list of all Crystal Report schedules within your SQL Server Reporting Services database, including deliver to, output format, schedule frequency, data or event triggers, report parameters and more. Results are exported to Excel with customizable column selections. | XLSX | |

|
Replace Crystal Report data source connections or qualified table names | Mass change the data source connections for a set of Crystal Reports. This is useful whenever you are migrating reports between development->test->production host environments, a database is moved to a new server, a database name has changed, the database type has changed or you want to change the data source connection type (for example you want to switch from ODBC to OLE DB connection or vice-versa). Output can over-write the original source files or be written to a new target folder (recommended). | ||

|
Replace the username, password, server or database of my Reports in an SAP BOE or Crystal Server repository | Mass change Crystal Report database login (authorization) information on a set of schedules within an SAP BOE or Crystal Server. Useful to change a large set of schedules rather then having to change each report schedule individually through the Crystal Management Console. Output can over-write the original source files or be written to a new target folder within the repository (recommended). |
Show Wizards on Start-up
At the bottom, left corner of the Wizards dialog box there is a Show on Startup check-box. Click to un-check this item to prevent the Search Wizard from launching automatically each time you start the program.