Reporting Tools
Examples in this section include creating a SQL statements detail extract and creating a database cross-reference list.
Create a Database Cross-Reference List
- Launch the Export Wizard for a Database Cross-Reference Extract:
- Using the main Wizard:
At the top, left of the main window, in the search bar, click on the button. The Wizards dialog will appear.

- Click to choose the Extract database objects (tables, stored procedures, views, etc.) used in my reports option.
- Using the menu:
- From the Find it EZ menu, select .
- Using the main Wizard:
-
Click on the button to continue.
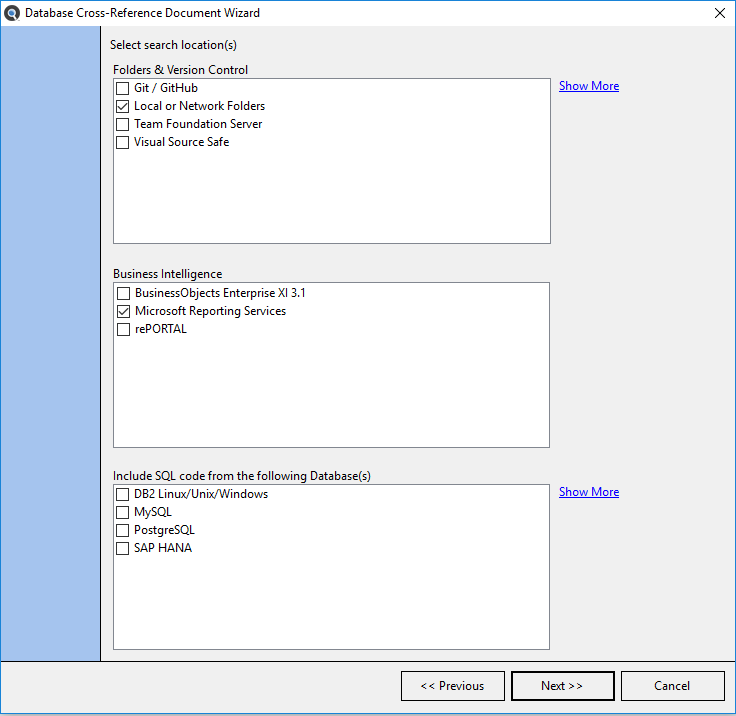
- Click to select the report file locations and optionally select the underlying source databases if you would like to include the SQL Select code from procedures, views or functions used by your reports.
-
Click on the button to continue. Each of the selected source report location and underlying database configuration panels will appear as in the examples below.
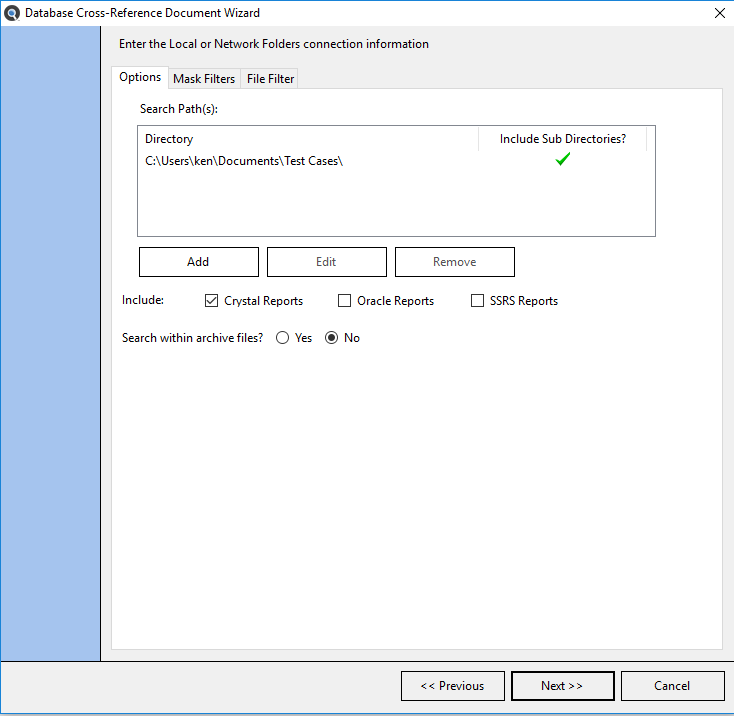

- Enter or confirm the pre-configured the file location and underlying database(s) connection information, click the check-boxes to include desired report types and known database objects used by your reports.
-
Click on the button to continue after each configuration panel is completed. Use the button to confirm valid settings where applicable. After the last location is configured, the Export Confirmation dialog will appear.
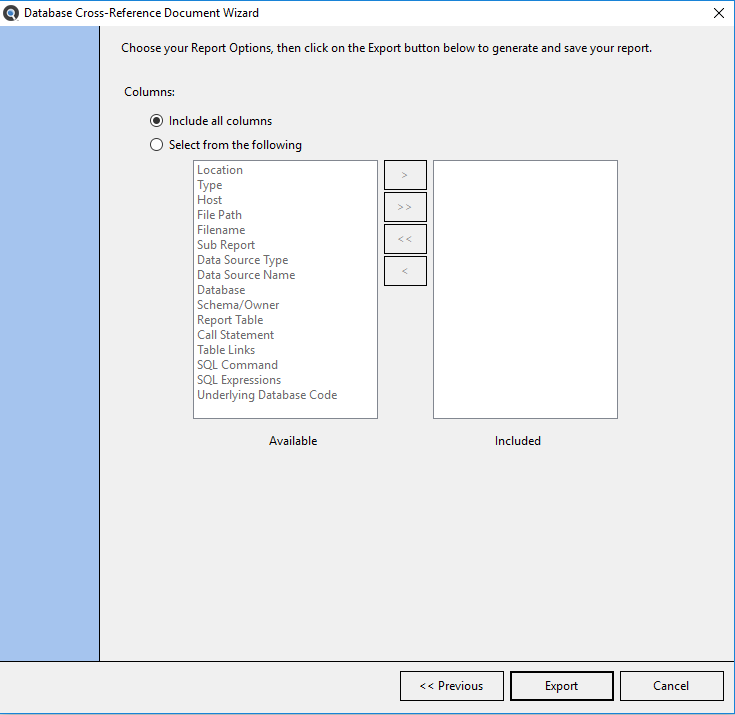
- Choose what columns you would like to export. The default is to include all columns available.
-
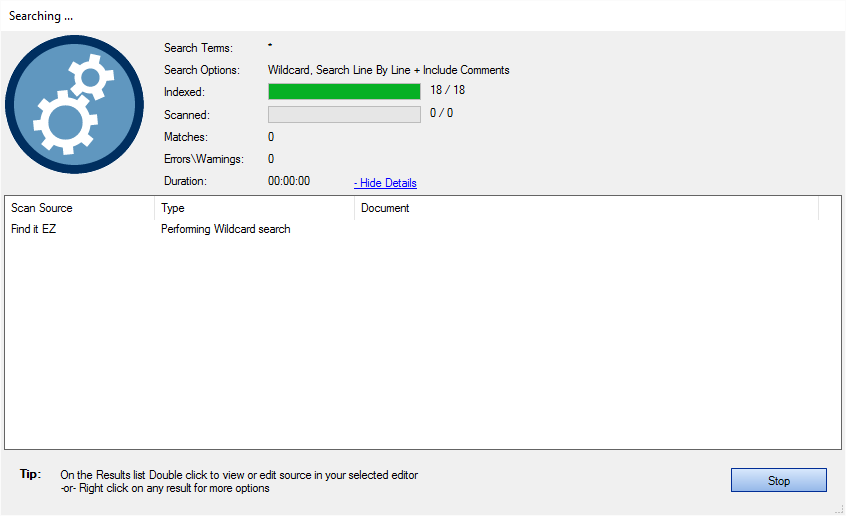
Click on the button. Find it EZ will begin gathering the required data.

-
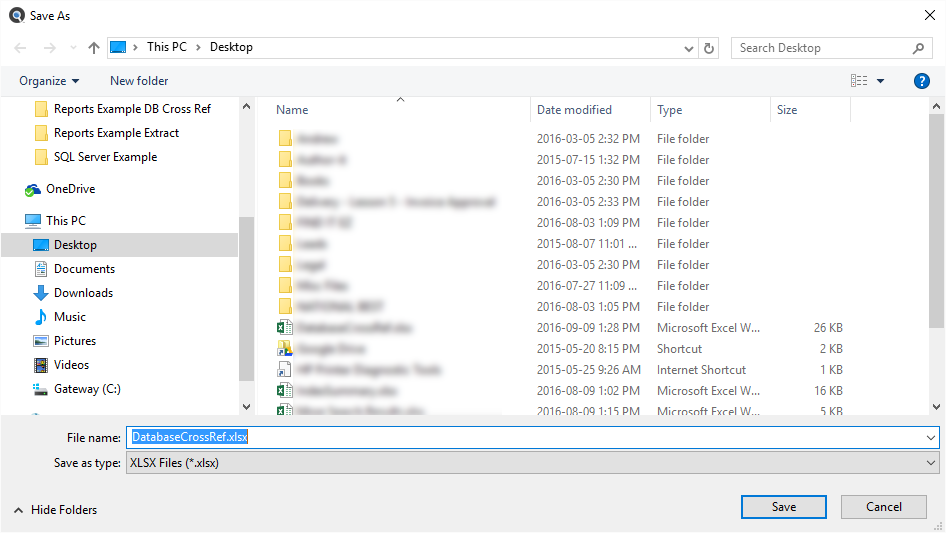
Once complete, a Save As dialog will appear. See example below:

- Save the report:
- Modify the File name as desired.
- Navigate to the desired folder location.
- Click on the button.
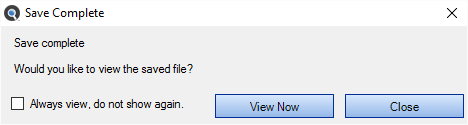
A Save Complete notification will appear, as below:
-
To view the saved report, click on the button. The file will open in the specified viewer / editor. See example below:
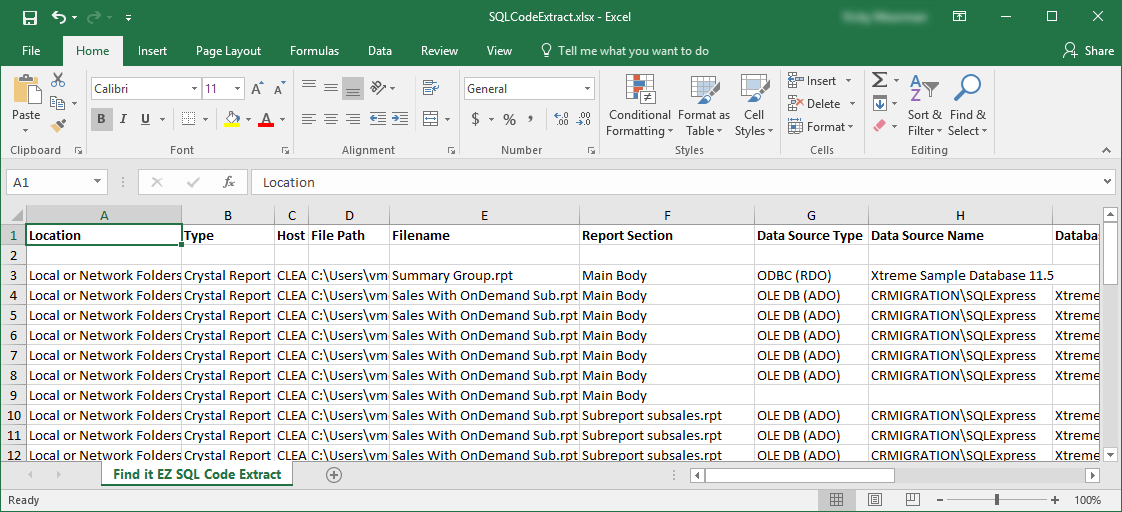
Report data will include the following:
- Location
- Type
- Host
- File Path
- Filename
- Report Section
- Data Source Type
- Data Source Name
- Database
- Owner
- Report Table
- Call Statement
- Table Links
- SQL Command
- SQL Expressions
- Underlying Database Code - SQL SELECT statement content based on procedures, views or functions referenced when source database configuration included
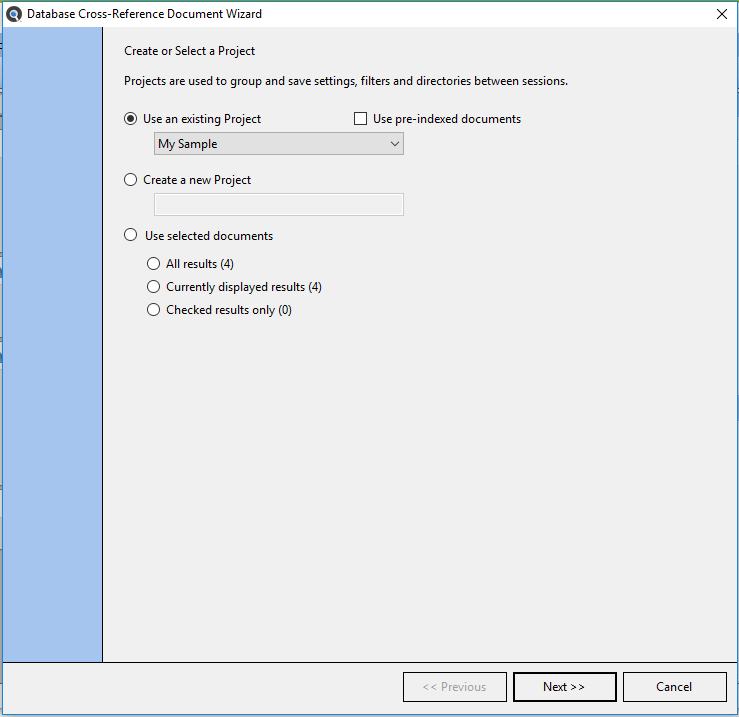
The Database Cross-Reference Document Wizard will appear. See below:
Extract all embedded SQL queries from within my reports
- Launch the Export Wizard for an embedded report SQL Queries extract:
- Using the main Wizard:
At the top, left of the main window, in the search bar, click on the button. The Wizards dialog will appear.
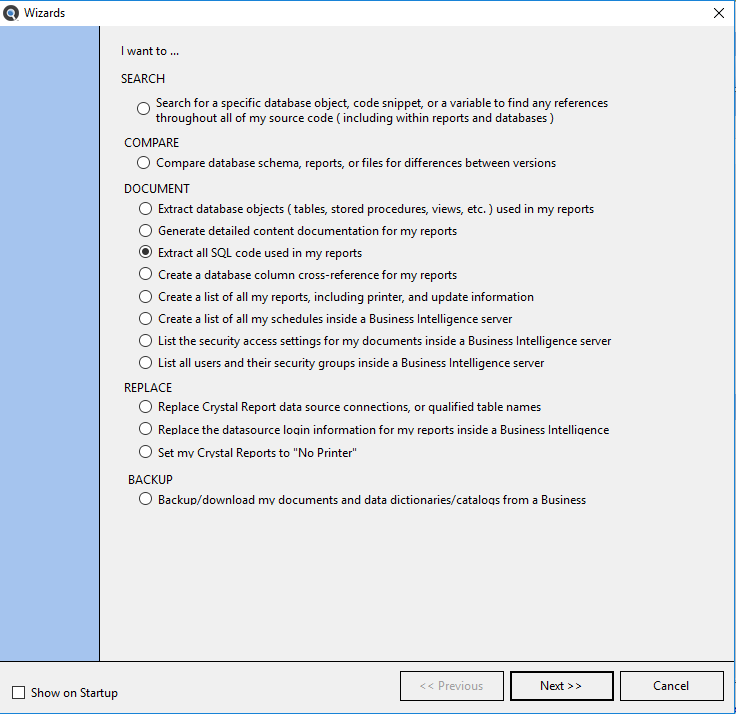
- Click to choose the Extract all SQL code used in my reports option.
- Using the menu:
- From the Find it EZ menu, select .
The Show SQL Queries Document Wizard dialog will appear.

- Using the main Wizard:
-
Click on the button to continue.
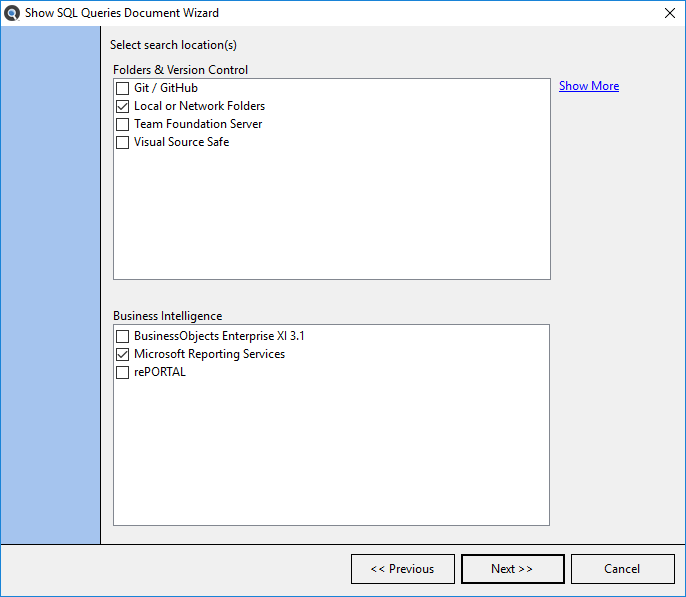
- Click to select all of the report file locations to include.
-
Click on the button to continue. Each of the selected source report location configuration panels will appear as in the examples below.
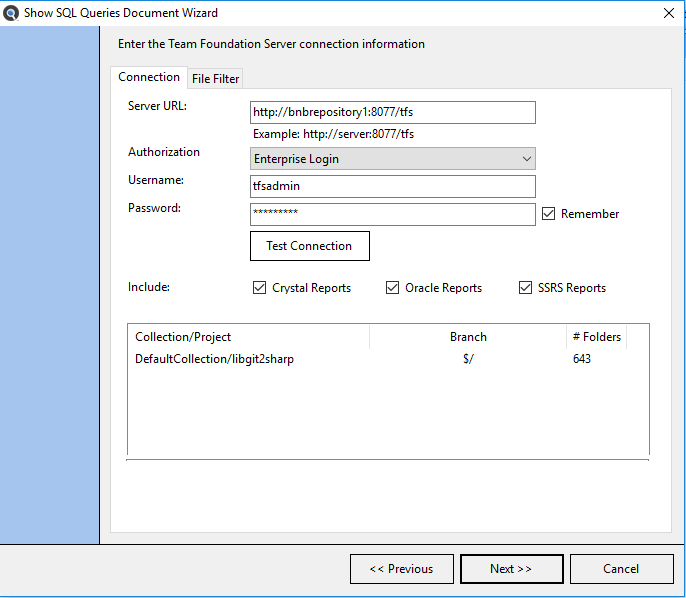

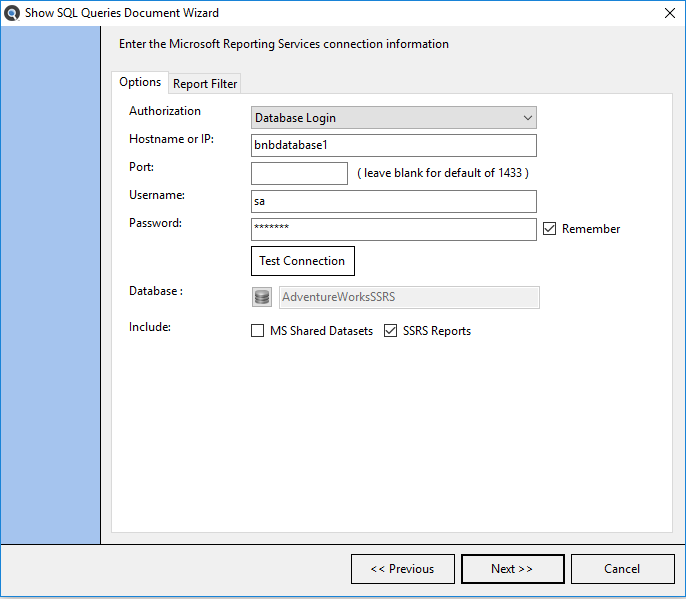
- Enter or confirm the pre-configured the file location and other connection information, click the check-boxes to include the desired report types to extract embedded SQL queries from.
-
Click on the button to continue after each configuration panel is completed. Use the button to confirm valid settings where applicable. After the last location is configured, the Export Confirmation dialog will appear.
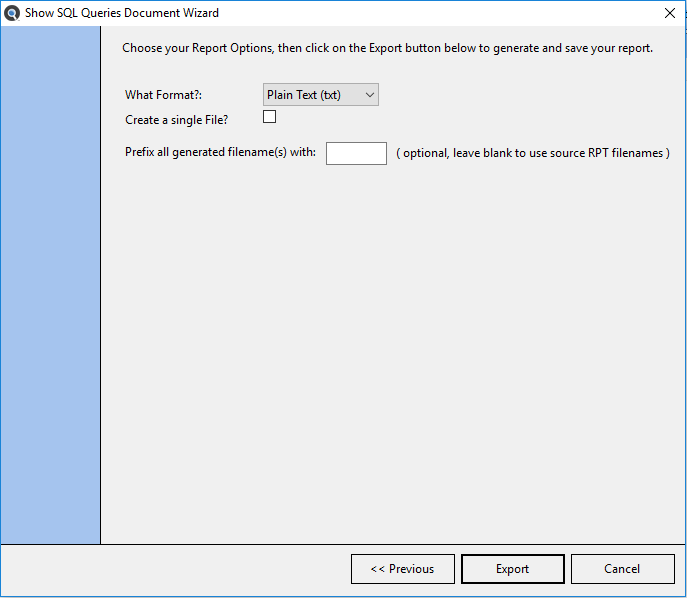
- Enter the export options:
- Select exported content file type.
- All data exported to a single file, or individual files created for each report?
- Optionally add a prefix to the file(s) created. Can be useful for separating data from each wizard run stored in the same destination output folder.
-
Click on the button. Find it EZ will begin gathering the required data.
-
Once complete, a Save As dialog will appear when the "single file" option was checked in step 7(b). See example below:
- Save the report:
- Modify the File name as desired.
- Navigate to the desired folder location.
- Click on the button.
A Save Complete notification will appear, as below:
-
Or once complete, if individual files are to be created, a Select Folder dialog will appear as below:
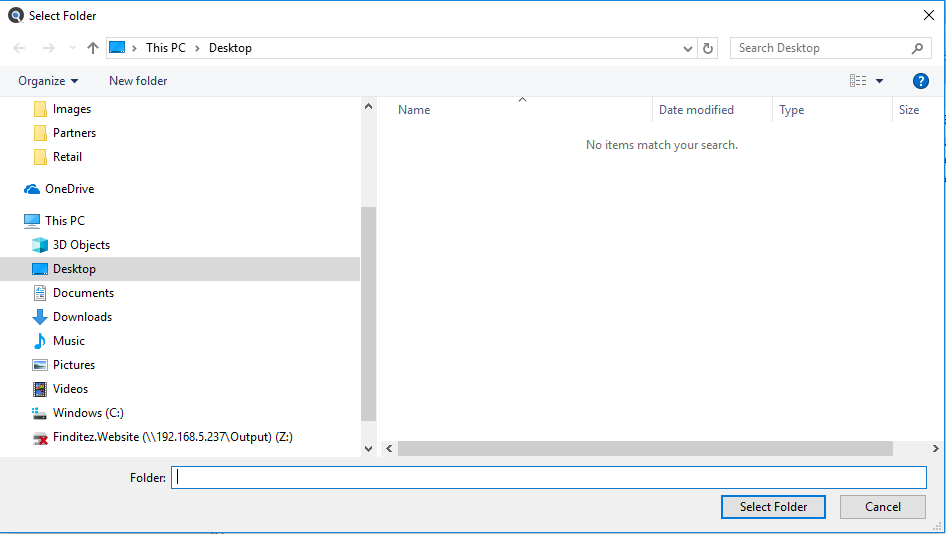
- Save the report:
- Navigate to the desired folder location.
- Click on the button.
The file creation process will begin.
Note: Each generated file will use the same filename as the source document, along with the target selected file type extension. Sub-folders will be created based on the source file location. A Replace File confirmation alert dialog may appear if a duplicate filename in the target output path already exists, as below: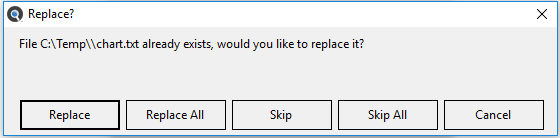
Chose the desired action to continue processing.
- Upon completion, the target output folder will appear, displaying all generated files as below: